Overview
To ensure the privacy and security of member data, application developers entering the healthcare interoperability space must adhere to stringent standards. Elderplan Interoperability APIs offer a developer-friendly, standards-based solution that allows third-party application vendors to connect their programs and access Elderplan data.
This document outlines the process for registering third-party applications to connect to the Elderplan FHIR server and access member data.
Registering Third-Party Applications
To connect a third-party application (referred to as “app”) to Elderplan, the vendor must first register and obtain approval from the Elderplan Administrator. Upon approval, the app developer will receive the OAuth token, URL, and client credentials (client ID and secret) necessary to connect the app to the Elderplan FHIR server.
Steps to Register a Third-Party App:
- Access the Elderplan App Gallery Developer Portal URL with the appropriate links below and click ‘Get Started’:
- For Test/Sandbox: Elderplan Test Portal
- For Production: Elderplan Production Portal
- Note: Ensure your app is registered and thoroughly tested in the Test/Sandbox environment before registering it in Production. The Elderplan Administrator will only approve the app in Production if it has been successfully registered and tested in Test/Sandbox.
- Sign Up:
- If you are a new developer accessing the portal for the first time, click ‘Sign Up’ and provide the necessary details to create a new developer account.
- Log In:
- Once your developer account is created, log in using your credentials.
- Enter Developer Account Details:
- For Registered Business Users: Provide the legal full name, designation, and DUNS (Data Universal Numbering System) number.
- For Individual Users: Enter your legal name.
- Provide Address Details:
- Complete the registration form with the requested address information.
For registering a business user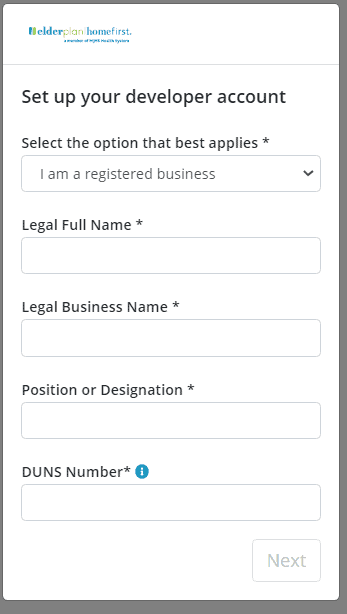
- Complete the registration form with the requested address information.
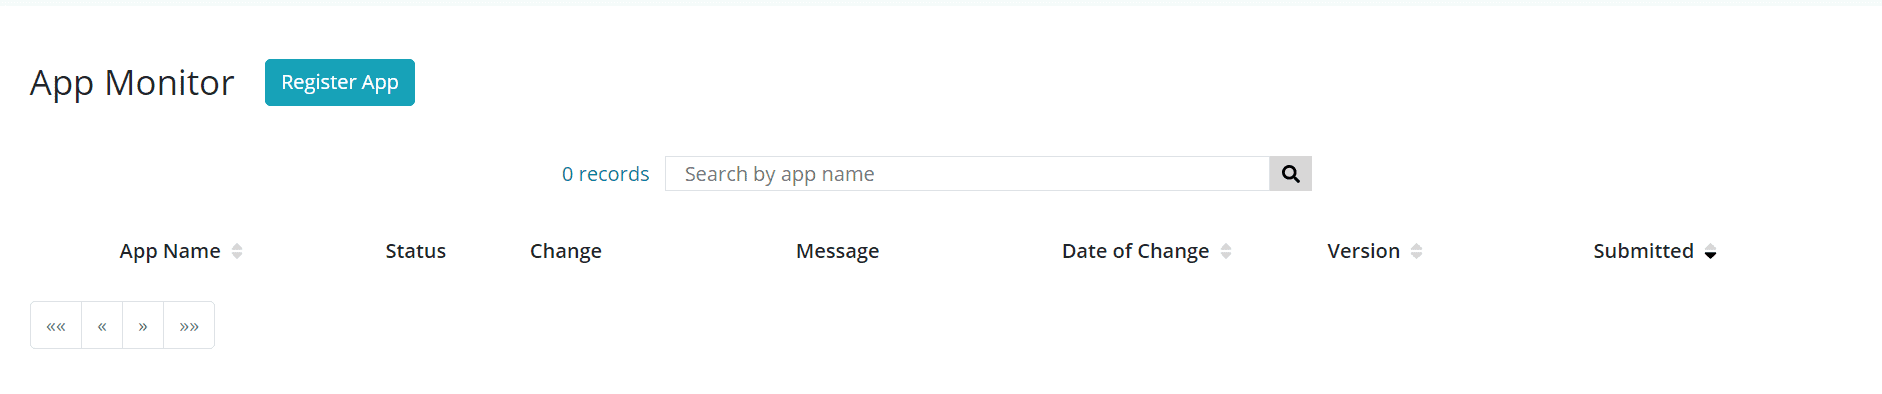
- Dashboard Access:
- After providing the developer account details, you will be directed to a dashboard where you can register new third-party apps or view the status of existing registrations.
- After providing the developer account details, you will be directed to a dashboard where you can register new third-party apps or view the status of existing registrations.
- Register a New App:
- Click the ‘Register App’ button and follow these steps:
- Step 1: Enter the app name.

- Step 2: Provide details about the app’s supported operating systems, home page URL, privacy policy, terms of service, and OAuth redirect URLs.

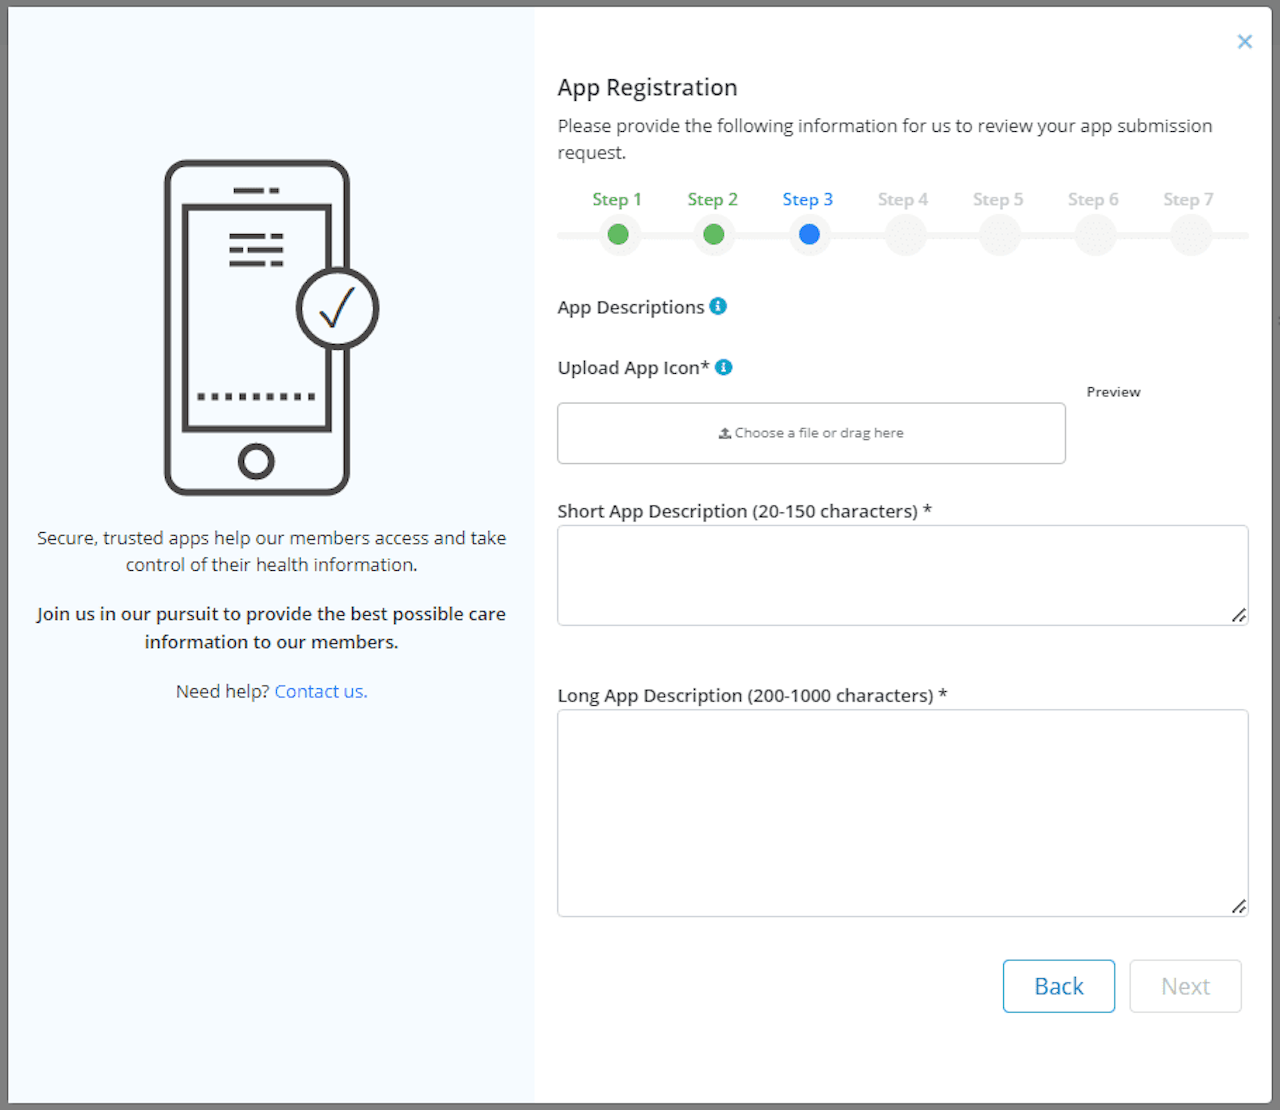
- Step 3: Upload the app icon and provide both a short and long description of the app (mandatory fields).
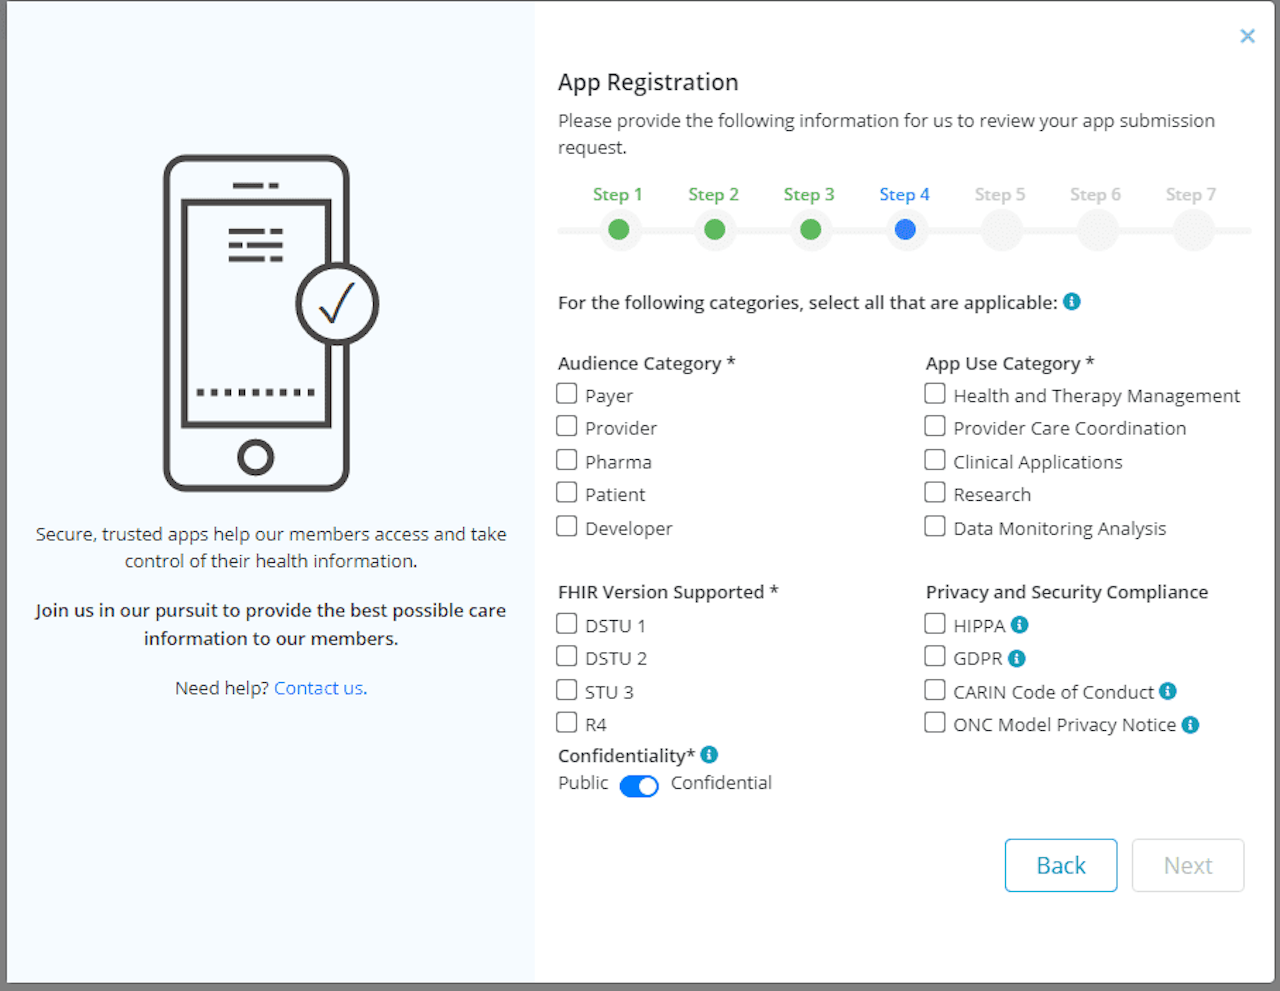
- Step 4: Select the categories and FHIR version that the third-party app supports (mandatory).
- Step 5: Specify the required scopes (mandatory), including:
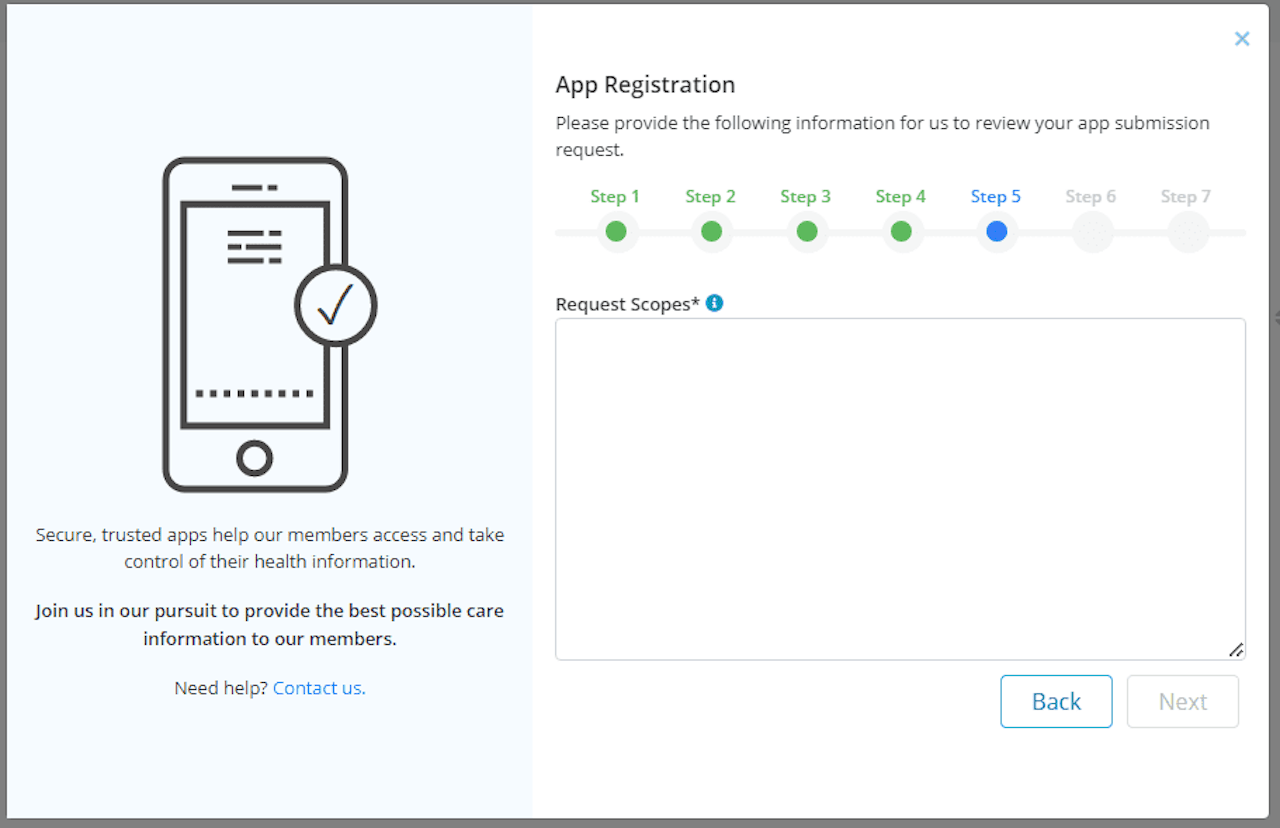
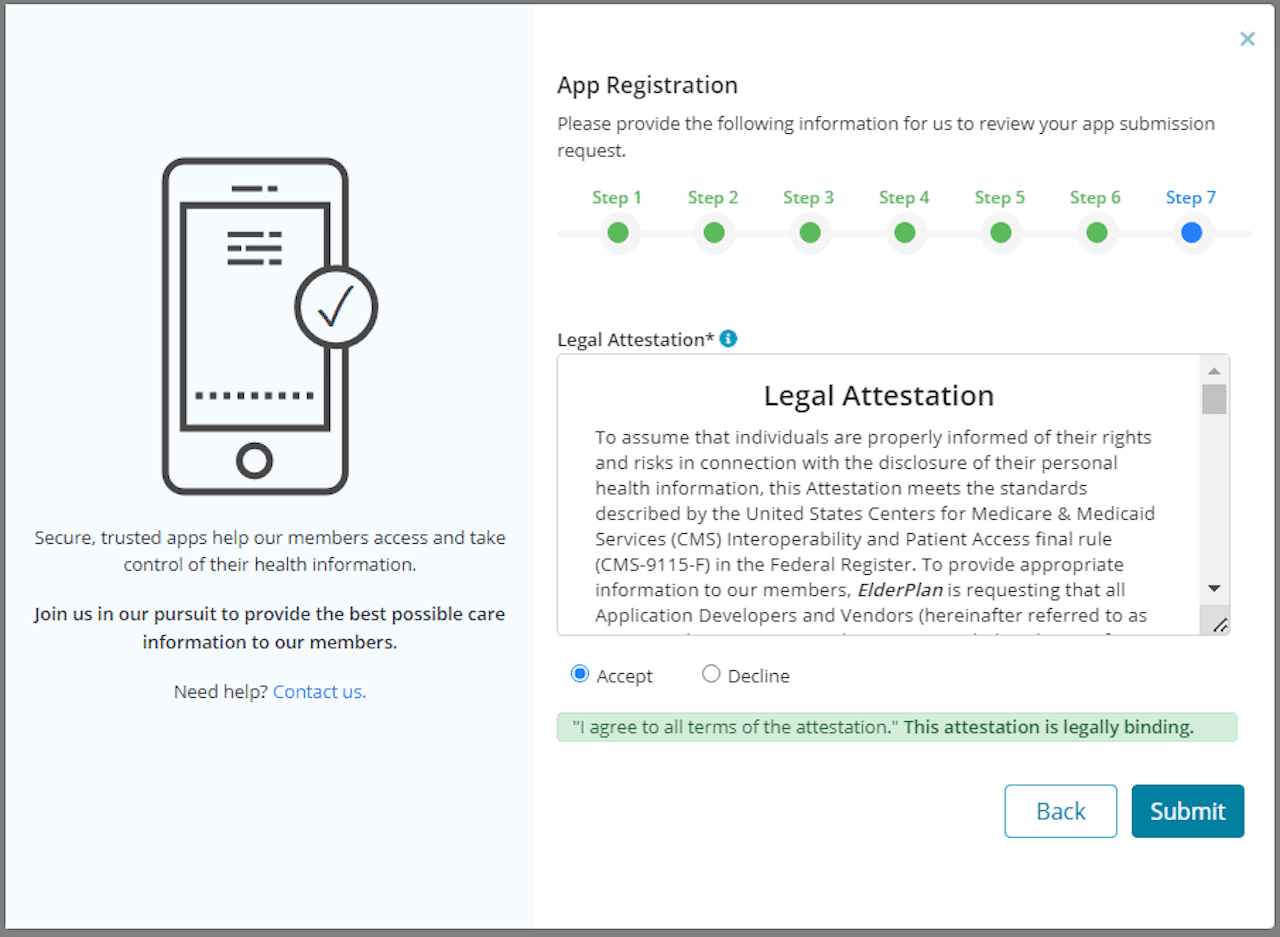
fhirUser launch launch/patient offline_access online_access openid organization/*.read patient/*.read patient/AllergyIntolerance.read patient/CarePlan.read patient/CareTeam.read patient/Condition.read patient/Coverage.read patient/Encounter.read patient/ExplanationOfBenefit.read patient/FamilyMemberHistory.read patient/Goal.read patient/Immunization.read patient/Location.read patient/Medication.read patient/MedicationAdministration.read patient/MedicationDispense.read patient/MedicationKnowledge.read patient/Observation.read patient/Organization.read patient/Patient.read patient/Practitioner.read patient/PractitionerRole.read patient/Procedure.read profile user/*.read - Step 6: Review the legal attestation and submit the form.
- Step 1: Enter the app name.
- Click the ‘Register App’ button and follow these steps:
- Approval Process:
- Once the app is registered, it will be reviewed by the Elderplan Administrator. The status will initially show as ‘Review’. Upon approval, the status will change to ‘Live’.

- Once the app is registered, it will be reviewed by the Elderplan Administrator. The status will initially show as ‘Review’. Upon approval, the status will change to ‘Live’.
- IP Allowlisting:
- As part of the approval process, you must provide a specific range of source IP addresses for Elderplan to allowlist. This ensures that only authorized traffic from your network is permitted. Application registration will be approved only upon receipt of this information. Send the IP addresses to: apisupport@mjhs.org.
- Obtaining OIDC Client Details:
- After approval, log in to the Elderplan developer portal to retrieve the OIDC client details from the registered app. REMINDER: Ensure you perform thorough testing in the Test/Sandbox environment before moving to Production.
- For Test/Sandbox: Elderplan Test Portal
- For Production: Elderplan Production Portal
- The dashboard will display all registered apps with their status (Pending/In Review/In Review -> Live/Rejected). Click on the approved app to view the OIDC client details (make sure to copy these details):
- OIDC Client ID
- FHIR Endpoint
- OAuth 2.0 Authorize Endpoint
- OAuth 2.0 Token Endpoint
- Use these details to connect your app to the Elderplan FHIR Repository.
- After approval, log in to the Elderplan developer portal to retrieve the OIDC client details from the registered app. REMINDER: Ensure you perform thorough testing in the Test/Sandbox environment before moving to Production.
- Obtaining the API Key:
- Once the app is approved, the Elderplan Administrator will create a unique API Key for the app and share it with the developer. This API key must be passed as a parameter in the headers of every API request to Elderplan.
Note: Elderplan has implemented rate limits on API requests to ensure smooth and secure operations. Exceeding the limit may result in failed requests and alerts for further investigation.
- Once the app is approved, the Elderplan Administrator will create a unique API Key for the app and share it with the developer. This API key must be passed as a parameter in the headers of every API request to Elderplan.
Developer Sandbox for Testing Data
To join the developer Test/Sandbox environment, follow these steps to register a sample application and retrieve synthetic data for a sample Patient ID:
- Log in to the Elderplan Developer Portal (Test/Sandbox):
- Access the portal using your developer account
- Copy the OIDC Connect Details:
- Retrieve and configure your app with the following details:
- OIDC Client ID
- FHIR Endpoint
- OAuth 2.0 Authorize Endpoint
- OAuth 2.0 Token Endpoint
- Retrieve and configure your app with the following details:
These steps will help you set up and test your application in the sandbox environment using synthetic data. If you have any questions or need further assistance, feel free to reach out.
Reference URL’s:
For more details about Elderplan’s Developer Portal, visit the link below:
Elderplan FHIR URL’s:
- For Test/Sandbox: Elderplan Test Portal
- For Production: Elderplan Production Portal
Note: Ensure your app is registered and thoroughly tested in the Test/Sandbox environment before registering it in Production. The Elderplan Administrator will only approve the app in Production if it has been successfully registered and tested in Test/Sandbox.
Support Contact details
If you encounter any issues related to app registration, developer account username/password, or OIDC connection in the test/sandbox/production environments, please email us with the details. We will address and resolve the issues as soon as possible, especially if they are related to the Elderplan FHIR server.
- Support Email ID: apisupport@mjhs.org